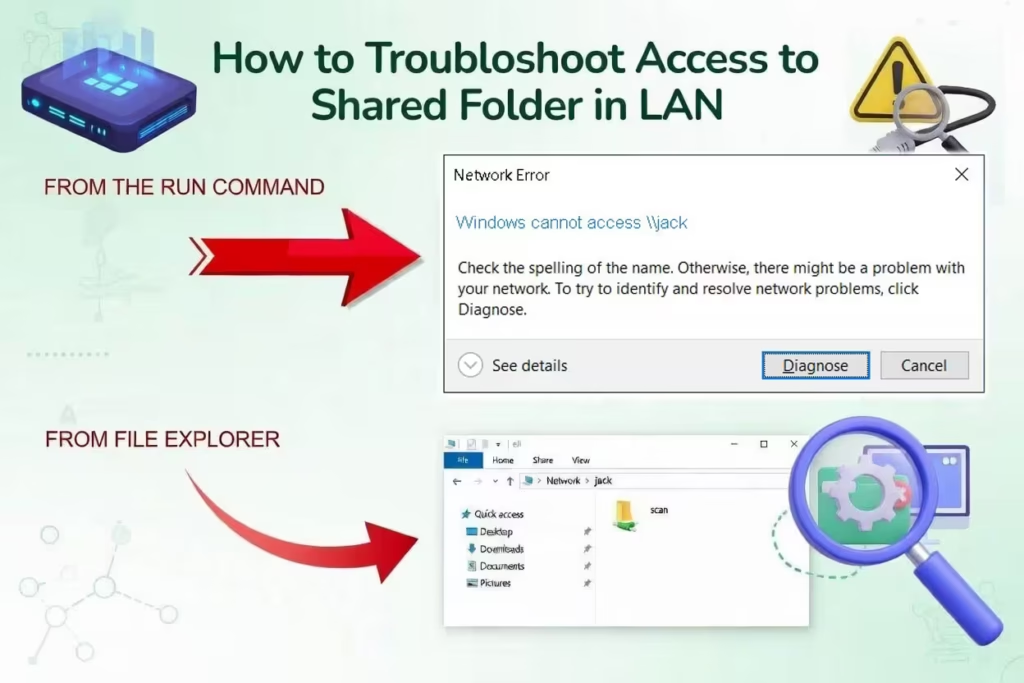
Are you pulling your hair out trying to connect your Windows 11 PC to a shared folder or another computer on your local network?
It’s a frustrating scenario: You have a setup where every other computer on the LAN (perhaps older Windows 10 machines) can access a shared drive just fine. But your Windows 11 machine stubbornly throws up the error: “Windows cannot access [computername]”.
You’ve probably already tried the basics. You’ve disabled the antivirus firewall. You’ve turned off Windows Defender firewall. And still, nothing works.
Don’t worry, your network isn’t broken. The issue is almost certainly due to Windows 11’s stricter default security settings regarding “Guest” access.
In this guide, we will show you the proven fix to get your Windows 11 machine talking to the rest of your network.
Why Is This Happening?
Windows 11 is designed to be more secure than its predecessors. By default, Microsoft has disabled a feature called “Insecure Guest Logons.”
Many older network shares (on Windows 10, NAS drives, or older servers) are set up to allow access without a password (guest access). Windows 11 sees this unauthenticated connection as a security risk and blocks it immediately, resulting in the “Windows cannot access” error message.
Since you’ve already ruled out firewalls, we need to tell Windows 11 that it’s okay to connect to these older types of shares.
Prerequisite: Check Your Network Profile
Before diving into the main fix, ensure your Windows 11 PC trusts the network it’s connected to. If your network is set to “Public,” Windows will block sharing features.
Go to Settings > Network & internet.
Click on your connection properties (Wi-Fi or Ethernet).
Ensure Network profile type is set to Private.
Image Placeholder: [Insert screenshot of Windows 11 Network Settings showing the “Private network” radio button selected. Alt Text: Windows 11 network profile settings set to Private.]
If it was already Private, move on to the main solution below.
The Solution: Enable Insecure Guest Logons
Since most users run Windows 11 Home Edition, the Group Policy Editor (gpedit.msc) is not available. We must use the Registry to apply this fix.
We will show you two ways to do this: the fast way (Command Prompt) and the visual way (Registry Editor). Both do the exact same thing.
Option A: The Quick Fix (Command Prompt)
This is the fastest method. It adds the necessary registry key with a single command.
Click the Start button and type cmd.
Right-click on Command Prompt and select Run as administrator. Click “Yes” on the User Account Control prompt.
Copy the following command exactly:
DOS
reg add "HKLM\SYSTEM\CurrentControlSet\Services\LanmanWorkstation\Parameters" /v AllowInsecureGuestAuth /t REG_DWORD /d 1 /fPaste it into the Command Prompt window (right-click to paste) and press Enter.
Image Placeholder: [Insert screenshot of the Administrator Command Prompt window showing “The operation completed successfully” after running the command. Alt Text: Command prompt showing successful registry add operation.]
You should see the message “The operation completed successfully.”
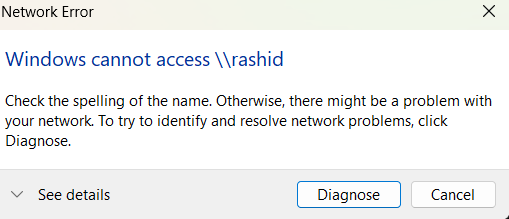
Now, try accessing your network share (\\rashid or whatever your target PC is named) again. It should connect immediately without a restart.
Option B: The Manual Way (Registry Editor)
If you prefer to see what you are changing, you can navigate there manually.
Press
Win + Ron your keyboard, typeregedit, and press Enter.In the Registry Editor address bar at the top, paste this path and press Enter:
Computer\HKEY_LOCAL_MACHINE\SYSTEM\CurrentControlSet\Services\LanmanWorkstation\ParametersLook in the right-hand pane for an entry named AllowInsecureGuestAuth.
If it exists, double-click it and change the “Value data” from
0to1.If it does not exist, right-click on empty white space in the right pane, select New > DWORD (32-bit) Value, name it
AllowInsecureGuestAuth, and set its value to1.
Image Placeholder: [Insert screenshot of the Registry Editor showing the ‘AllowInsecureGuestAuth’ key set to value 1. Alt Text: Windows Registry Editor showing the correct LanmanWorkstation parameters.]
Once done, close the Registry Editor and retry your network connection.
Still Not Working? Try the IP Test
If the registry fix above didn’t solve it, you might be facing a Domain Name System (DNS) issue where your PC can’t resolve the name of the other computer.
Go to the target computer (the one you are trying to access). Open Command Prompt and type
ipconfigto find its IPv4 Address (e.g., 192.168.1.50).On your problem Windows 11 PC, press
Win + R.Type the IP address instead of the name:
\\192.168.1.50(replace with the actual IP) and hit Enter.
If this works, you have a name resolution issue on your router or PC, but at least you can access your files using the IP address shortcut!
Conclusion
Windows 11’s tightened security is generally a good thing, but it often breaks LAN file sharing in home environments. By enabling insecure guest logons via the methods above, you should regain access to your shared network folders.
Did this fix work for you? Let us know in the comments below!